CyberArk has long been at the forefront of identity security, with deep expertise in Privileged Access Management (PAM). Organizations around the world rely on PAM Solutions to secure access to cloud consoles and protect their most sensitive assets. But securing the cloud is an evolving challenge—one that requires a blend of traditional PAM and modern identity security strategies.
In this post, we’ll explore how to integrate CyberArk Identity as an External Authentication Method (EAM) to enhance security for Azure privileged accounts managed within CyberArk PAM (Self-Hosted or PCloud). You’ll get a step-by-step guide on configuring CyberArk Identity as an Entra ID MFA provider, ensuring both security and a frictionless login experience.
Create a new OIDC app with Microsoft Entra ID
Go to https://portal.azure.com/
Navigate to “App registrations“
Click “New registration” to create and register a new app.
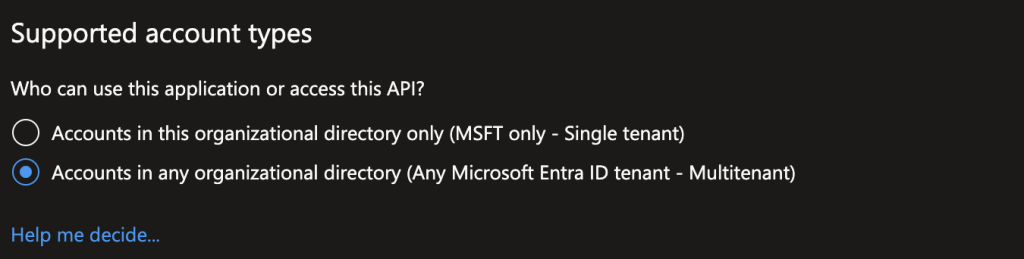
Give it a name and choose “Accounts in any organizational directory (Any Microsoft Entra ID tenant – Multitenant)” in the “Supported account types”
Click Next
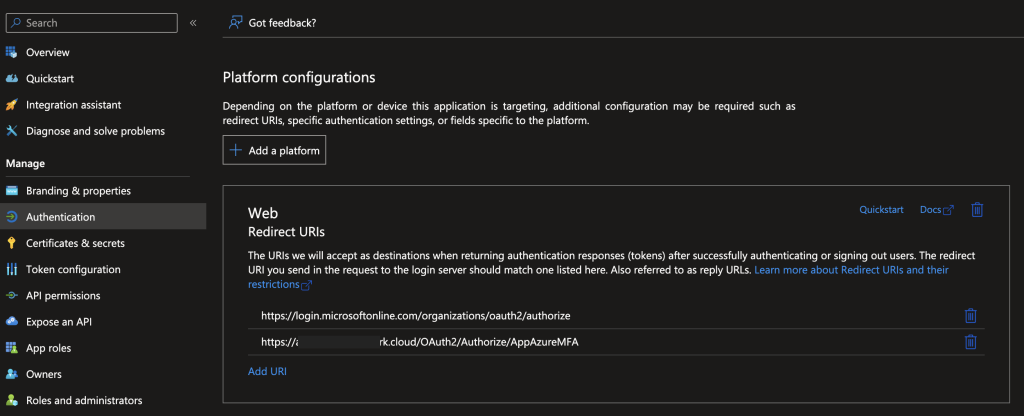
In the Authentication Section > Add Platform > Web
In the URL add:
https://login.microsoftonline.com/organizations/oauth2/v2.0/authorize
https://{{tenant_id}}.id.cyberark.cloud/OAuth2/Authorize/{{oidc_id}}
*We will define the CyberArk Identity oidc app later
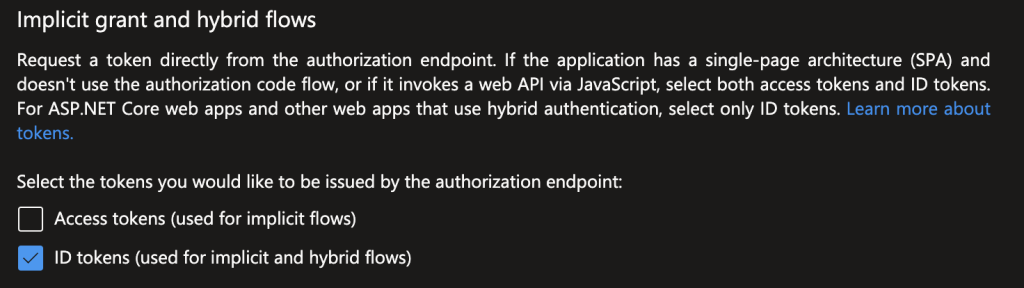
In the Implicit grant and hybrid flows section, choose: ID tokens (used for implicit and hybrid flows)
In Certificates & secrets page create a client secret
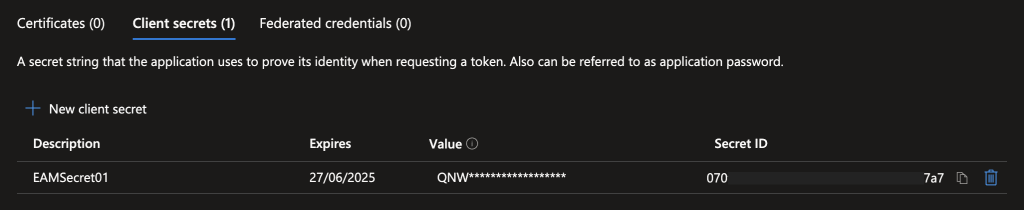
NB : save the value in a secure vault like workforce password manager before closing the window
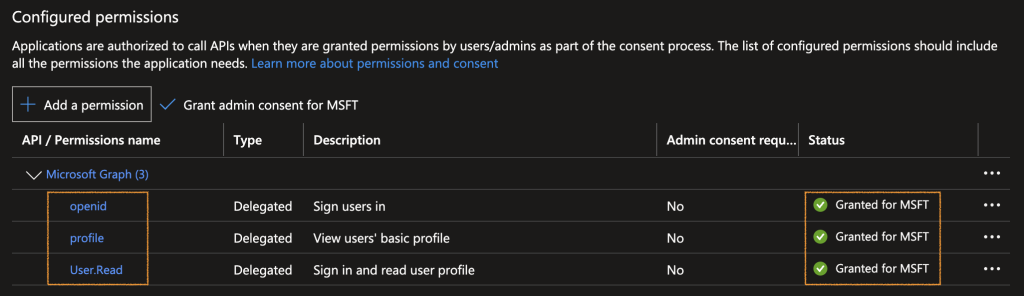
In the API permissions click on Add a permission, select Microsoft Graph and choose Delegated permissions then select the following permission and click on Grant admin consent:
In the Overview page, click on Endpoints and note : OpenID Connect metadata document
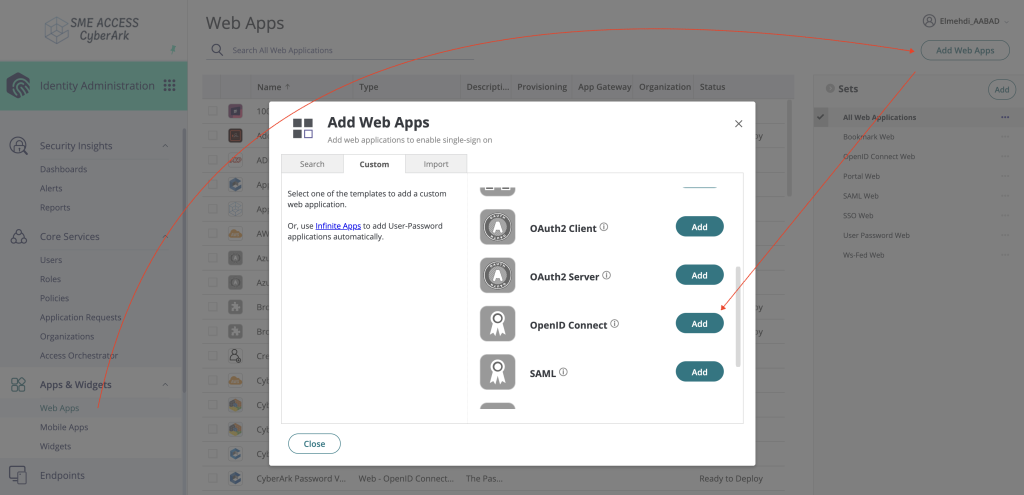
Create a new OIDC web app in CyberArk Identity
Go to your tenant’s admin portal
Navigate to “web apps” and add an OpenID Connect application
In the Settings page, provide an Application ID, Name and change the logo
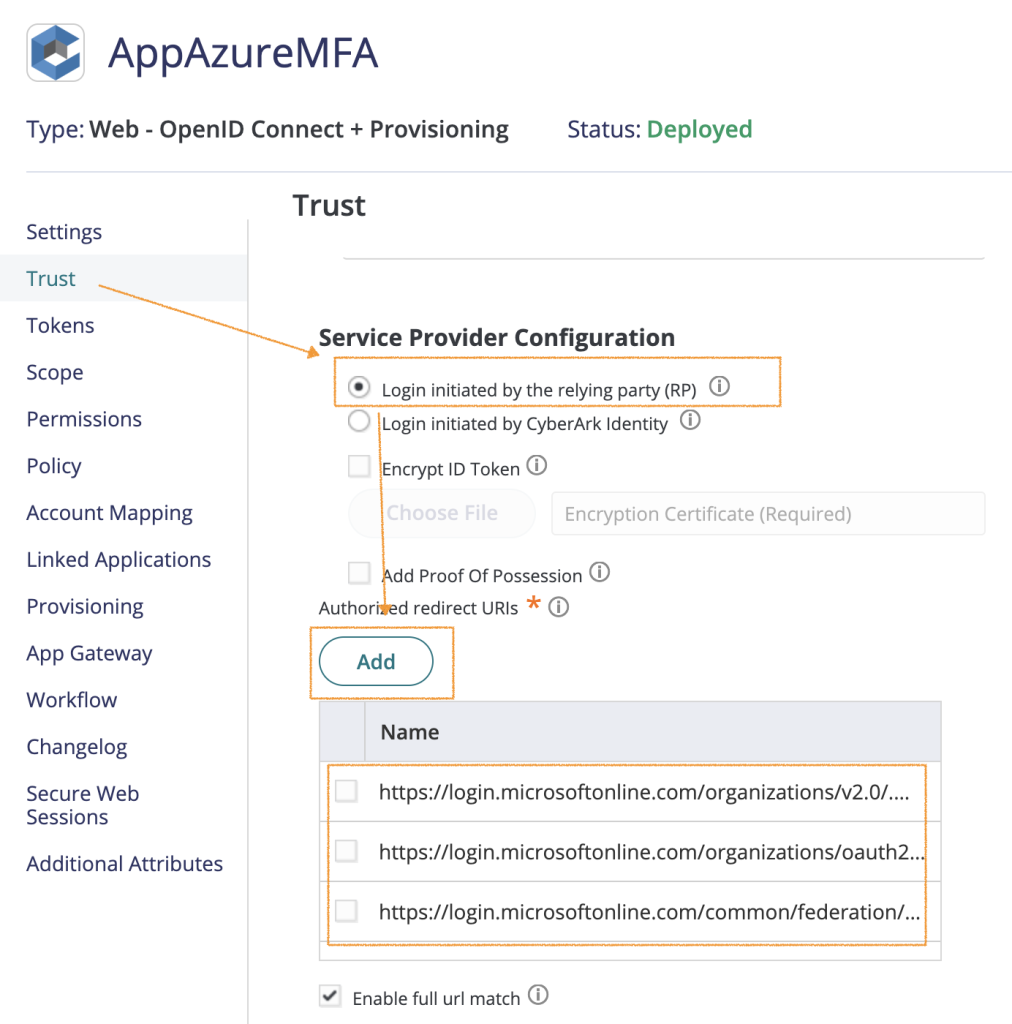
In the trust page Select “Login initiated by the relying party (RP)” and add the following Authorized redirect URIs:
- https://login.microsoftonline.com/organizations/oauth2/v2.0/token
- https://login.microsoftonline.com/common/v2.0/.well-known/openid-configuration
- https://login.microsoftonline.com/common/federation/externalauthprovider
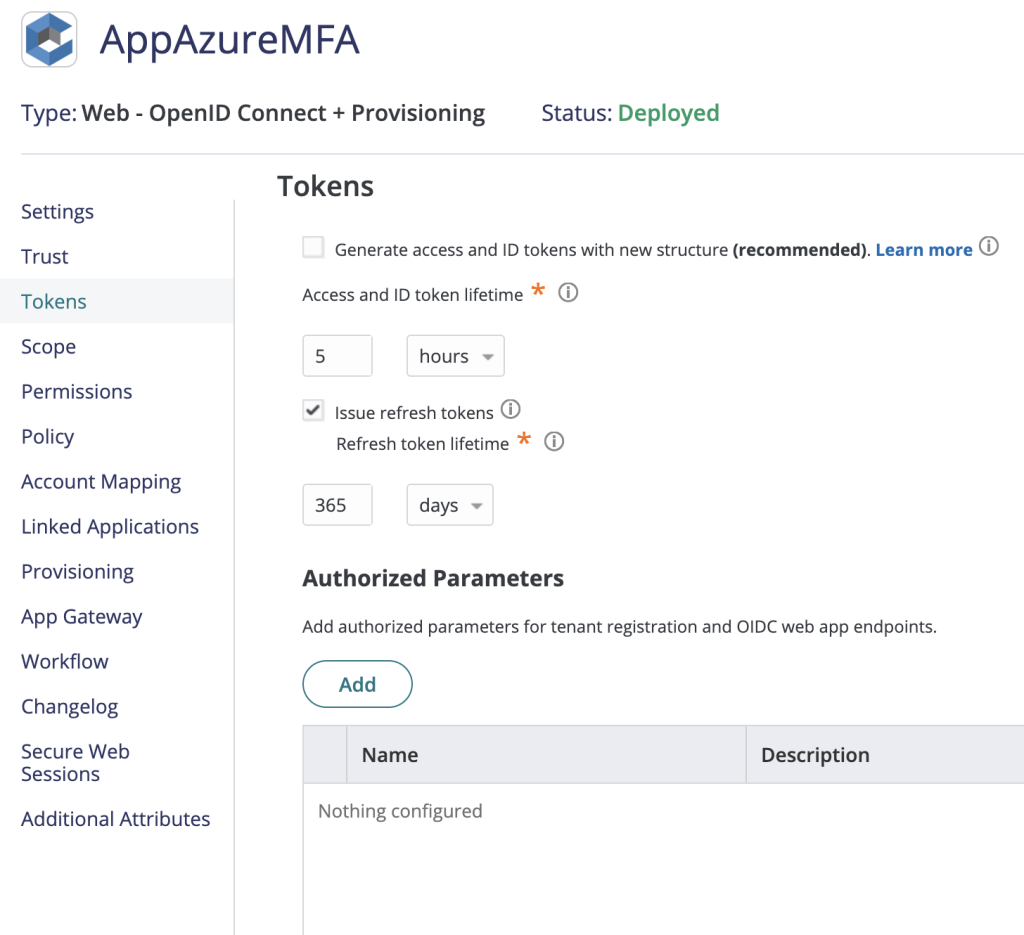
In the Tokens page configure ID token and Refresh token lifetime that meet your security requirements.
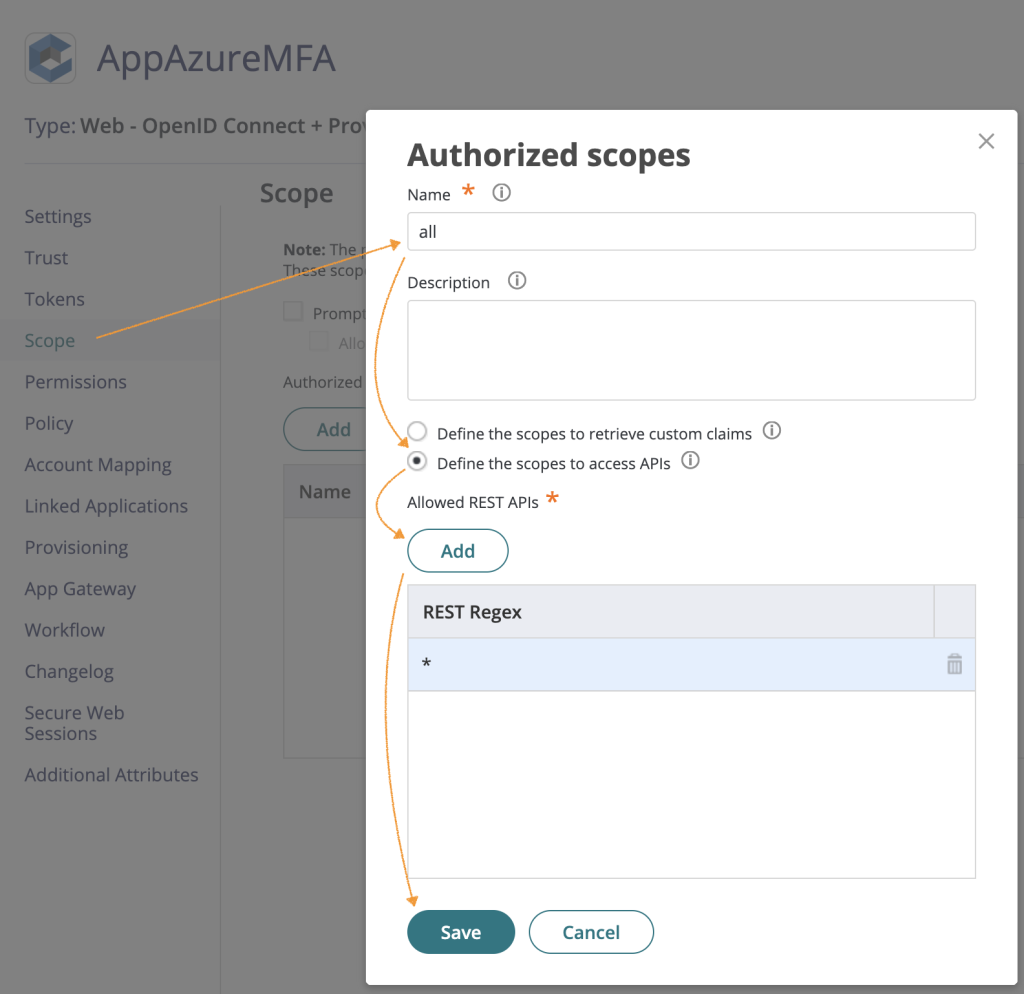
In the Scope page add All
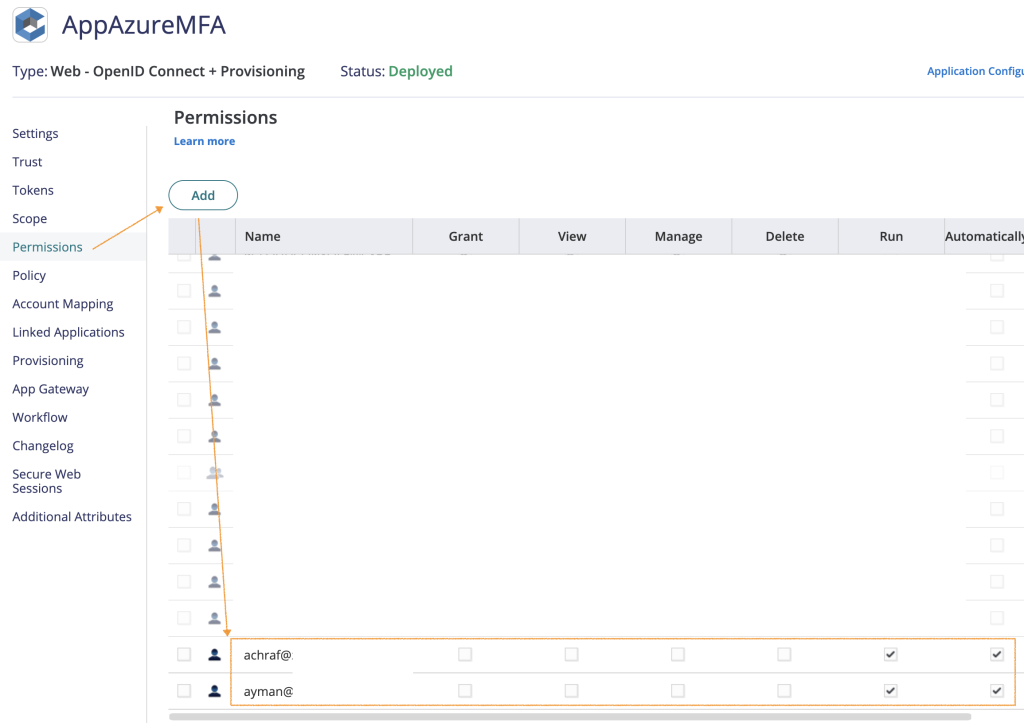
In the Permissions page : add the users, roles or groups that tries to login from ENTRA ID in your tenant and add them to the permissions of this app.
In the Policy page select Add new profile from the Default Profile List, give it a name and select the factors to leverage.
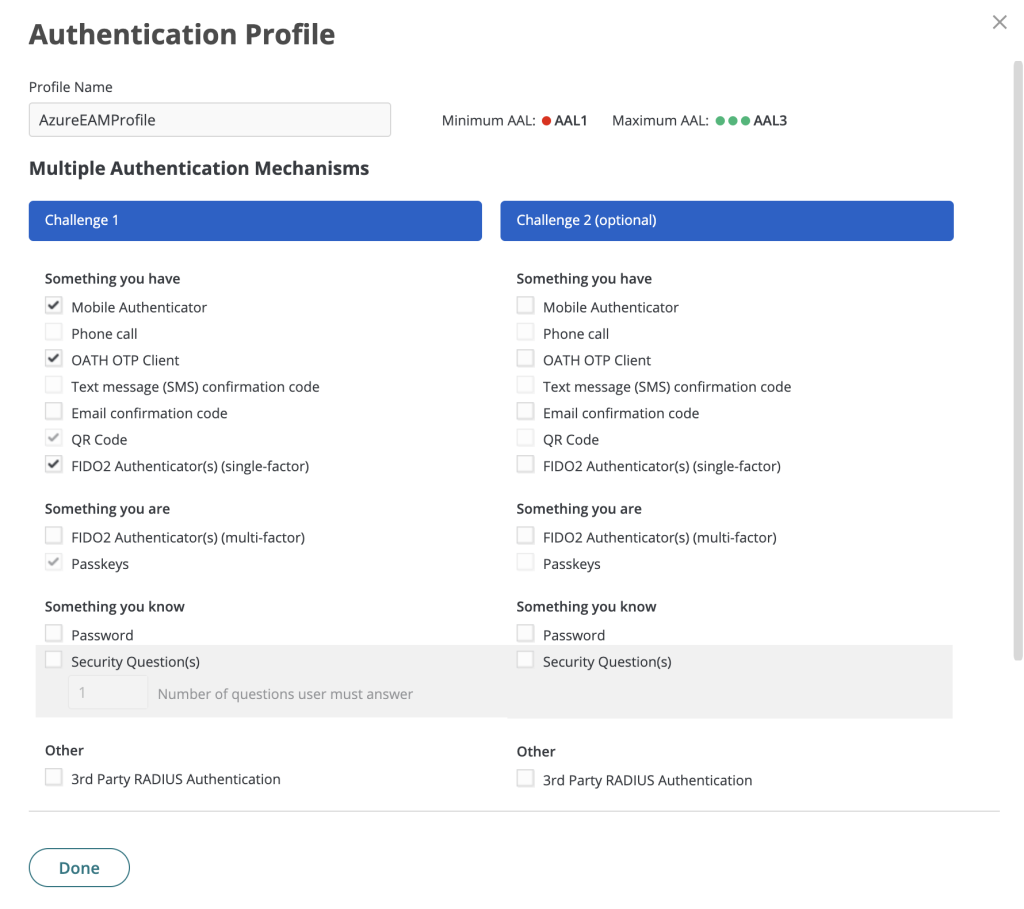
When creating an authentication profile, do not select the Password/Security question because Microsoft does not support these options as 2FA factors.
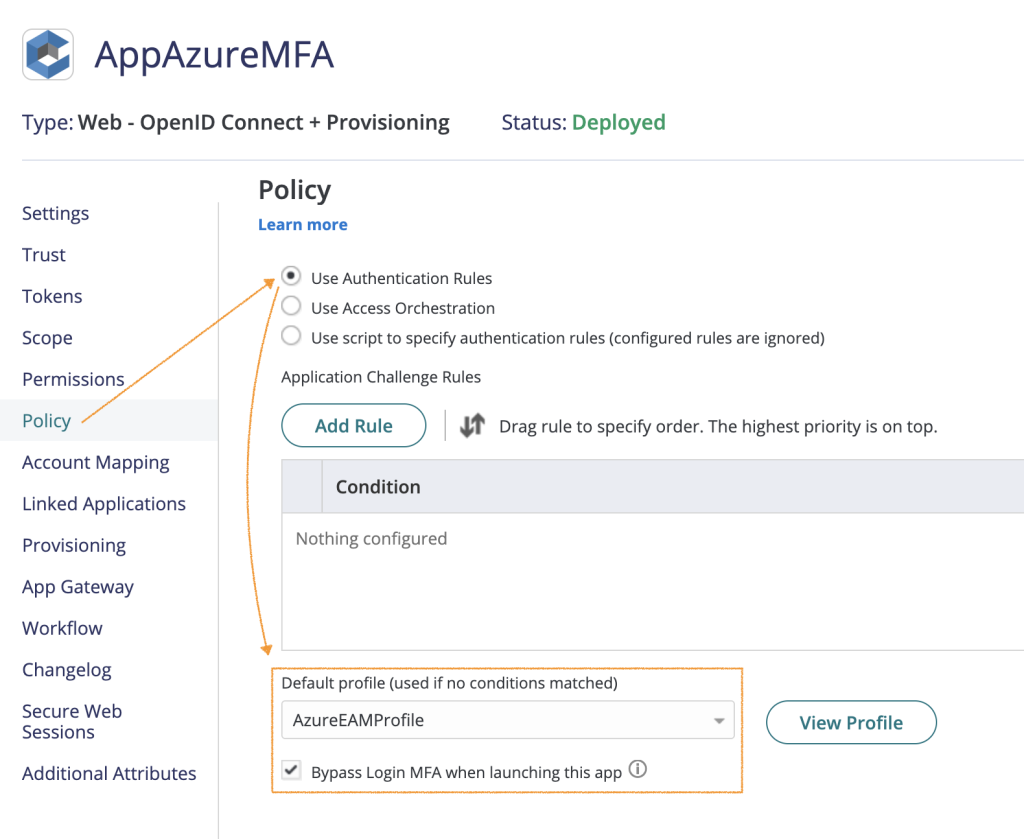
Finally, check Bypass Login MFA when launching this app:
Create an external authentication method in Microsoft Entra ID
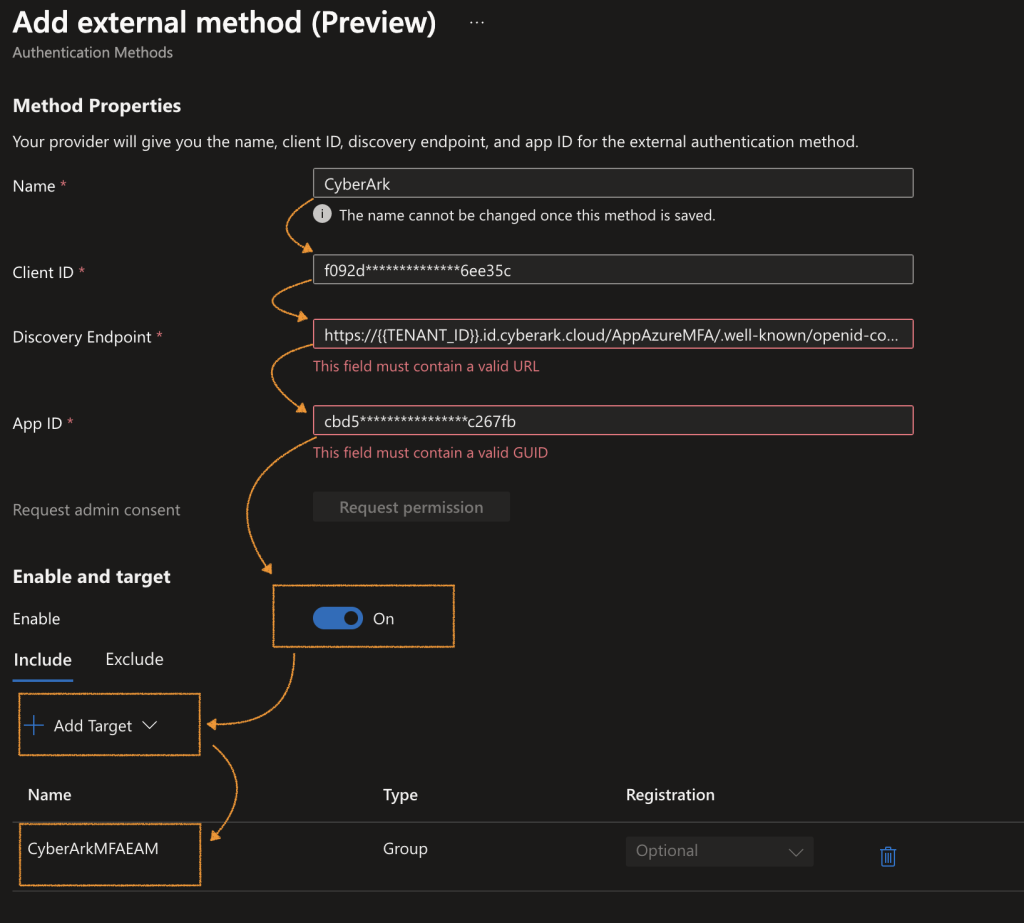
Search for Microsoft Authentication methods and click on Add External Method (Preview)
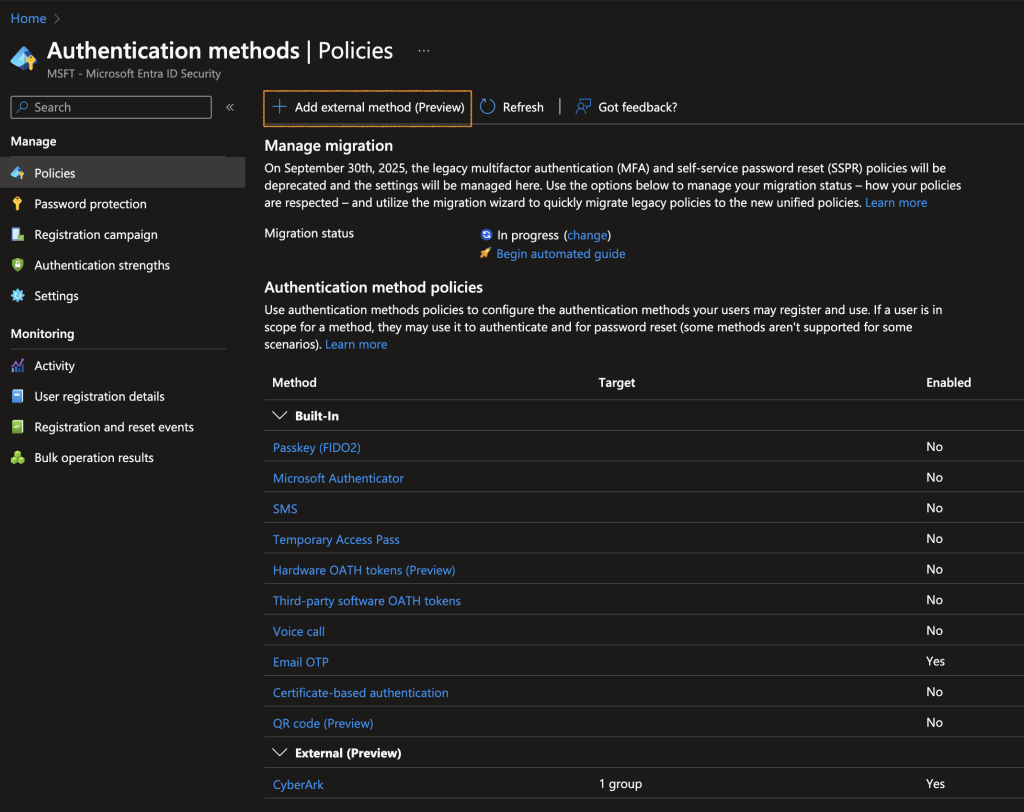
Copy and paste the following information to create an external authentication method.
| Client ID | This is the app ID in CyberArk Identity for OpenID apps. Go to Identity Administration portal > Web Apps, select your web app and go to Settings > App Key. |
| Discovery endpoint | This is the Metadata URL in CyberArk Identity for OpenID apps. Go to Identity Administration portal > Web Apps, select your web app and go to Trust > OpenID Connect metadata URL. |
| App ID | This is the application ID for Microsoft’s enterprise app (created in the 1st step – Create a new OIDC app with Microsoft Entra ID). Use this for your specific application as needed. |
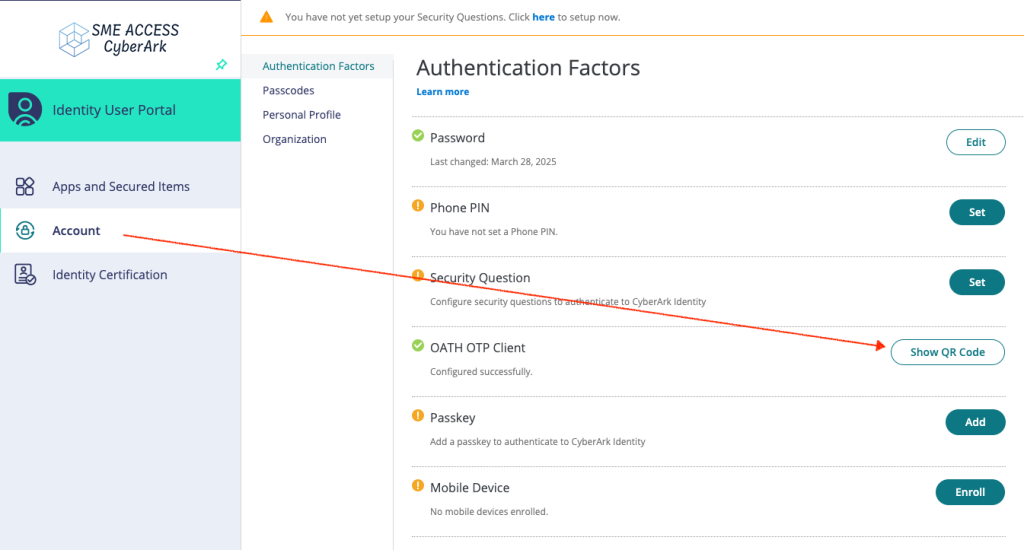
Before testing, the enduser should have at least one authentication factor configured in identity.
Dynamic registration is a roadmap item.

Enjoy !
Thank you / Merci / شكرًا